If you have applied for an Initial Public Offering (IPO) and used Google Pay UPI ID to create your IPO mandate request, then you need to approve the IPO mandate request on the Google Pay (Gpay) App.
Google Pay is a widely popular UPI application where you can link your bank account and access UPI services like UPI money transfers and payments. In addition, you can also create your mandate for IPO and approve it on Google Pay.
So today, we will guide you through a step-by-step process on how to check and accept the IPO mandate on Google Pay Application. Read also: How to add UPI Number on Google Pay
1. Apply for IPO and Create a Mandate using Google Pay UPI ID
The first step is you need to apply for IPO from your Demat account and create a UPI Mandate (Auto-Debit) request using your Google Pay UPI ID. This request will be sent on the Google Pay app where you need to accept the mandate.
So let’s place an IPO order and create a Mandate:-
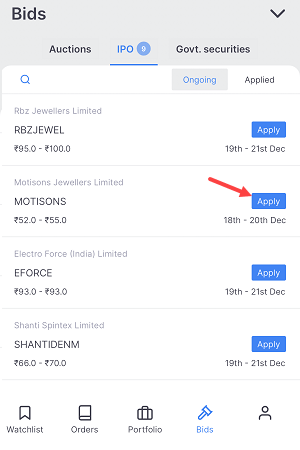
Step 1: Login to your Demat account app and select your IPO to apply.
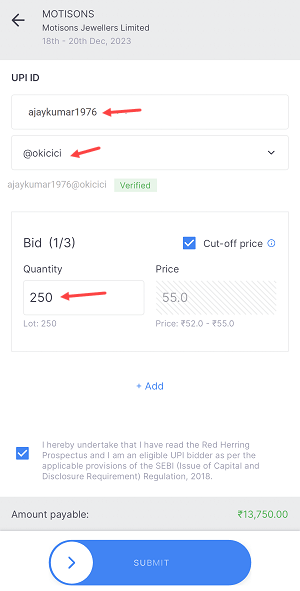
Step 2: On the IPO application screen, enter your Google Pay UPI ID, enter the total number of lots you want to apply and submit your application.
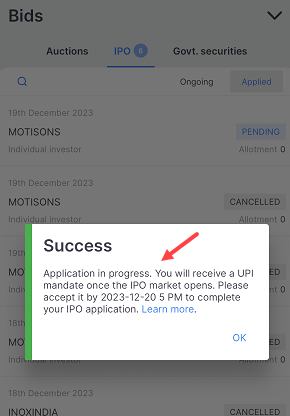
Step 3: Congratulations! Your IPO order has been placed successfully. As the next step, you will soon receive a UPI mandate request on the Google Pay app. To complete your IPO application, it is important that you approve the mandate before 5 PM. In case you fail to approve it before 5 PM, the mandate request will expire and you may need to initiate the process again.
2. Check and Approve IPO Mandate Request on Google Pay
After placing your IPO order and creating a UPI mandate request, wait for 5-10 minutes to receive the IPO mandate request on Google Pay. It may take some time, so please be patient.
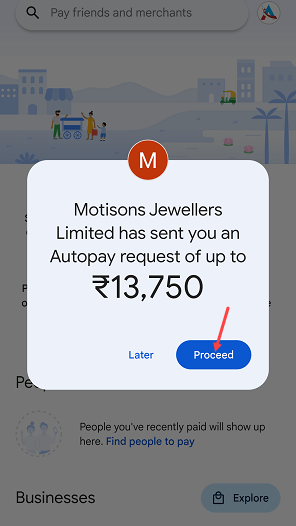
Step 1: Open the Google Pay application and you will be prompted to approve your iPO UPI mandate. Tap on the proceed button.
Step 2: Next screen, tap on the “Authorize” button to accept the IPO mandate request.

If you missed the IPO mandate request on the App or accidentally closed the pop-up screen, don’t worry. Follow these steps to find and approve your request.
- Open the Google Pay profile section by tapping on the profile picture as you can see in the below screenshot.

- In the profile section, you will see the “Auto Pay” option, click to open.
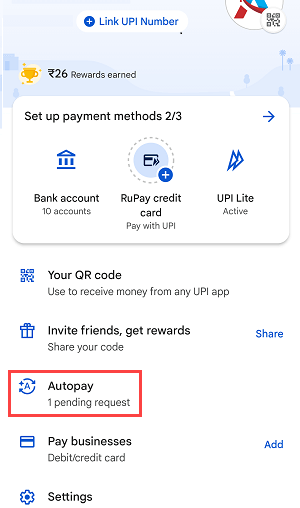
- Next screen click on the “Pending” section where you can check your IPO mandate request. Just click and open the request.
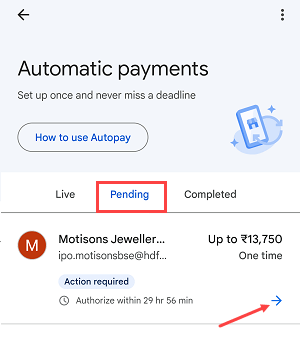
- Finally, Tap on the “Authorize” button to approve the mandate request.
IPO Mandate Approved on Google Pay & Your Application Completed
Congrats! Your IPO mandate request on Google Pay has been successfully approved. As a result, your IPO application is now complete and the IPO amount has been blocked in your bank account.
All you have to do now is wait for the IPO allotment announcement date. When you receive the allotment, the amount will be automatically debited from your bank account and the shares will be credited to your Demat account.
In case you don’t receive the IPO allotment, the blocked amount will be unblocked shortly.
Hope this step-by-step guide will help you to find and approve your IPO mandate request on Google Pay (Gpay).