Registering an email ID with your State Bank of India (SBI) account online through net banking is a simple and secure process. This guide will walk you through each step in detail, ensuring you can register your email ID seamlessly. Whether you’re a new user or looking to manage your account details, follow these instructions to complete the process efficiently.
Table of Contents
Why Register an Email ID with SBI Net Banking?
Linking an email ID to your SBI account allows you to receive important notifications, statements, and one-time passwords (OTPs) directly in your inbox. This enhances security and keeps you updated on your account activities. Let’s dive into the step-by-step process.
Step-by-Step Guide to Register an Email ID with SBI Account Online
Step 1: Log in to SBI Net Banking

- Open your web browser and visit the official SBI website (www.onlinesbi.com).
- Locate the Login button on the homepage and click on it.
- Enter your username and password to access your account.
Step 2: Navigate to My Accounts & Profile

- On the dashboard, look for the My Accounts & Profile tab. It is typically highlighted with an icon of a person.
- Click on My Accounts & Profile to proceed. This section allows you to manage your account details, including updating your email ID.
Step 3: Access the Profile Section

- Within the My Accounts & Profile menu, you will see several options such as Account Summary, Account Statement, Profile, and others.
- Click on the Profile option, which is marked with a person icon. This will take you to the profile management page.
Step 4: Select My Profile
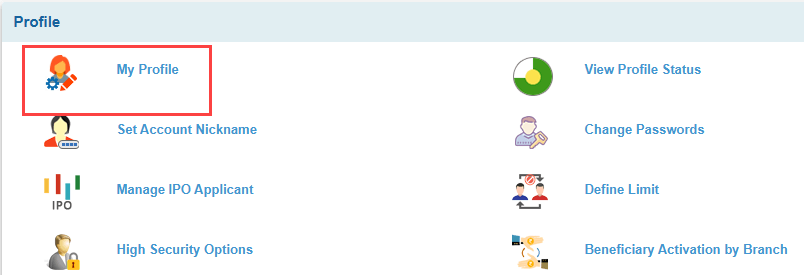
- On the Profile page, you will find sub-options like My Profile, Set Account Nickname, Manage IPO Applicant, and more.
- Click on My Profile to view and edit your personal details, including your email ID.
Step 5: Enter Profile Password
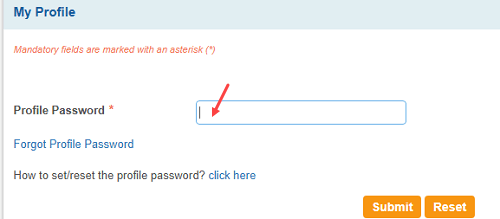
- You will be asked to enter your Profile Password in the designated field on the My Profile page.
- Input your profile password and click Submit to authenticate the request.
Step 6: Update Email ID

- On the My Profile page, scroll to the Email ID field.
- Click the Update button next to the Email ID section to initiate the email registration process.
- You will be redirected to a new page titled Update Email Details.
Step 7: Enter Your Email ID
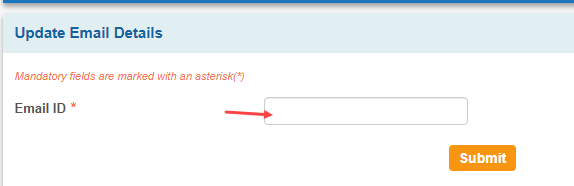
- On the Update Email Details page, you will see a field labeled Email ID marked with an asterisk (*), indicating it is mandatory.
- Enter your desired email address in the provided text box.
- Click the Submit button to proceed.
Step 8: Enter High Security Transaction Password

- Next, you will need to enter the High Security Transaction Password (OTP) received in your email ID.
- If you haven’t received the password, click Click here to resend the OTP to receive it again via email or SMS.
- Once entered, click Confirm to proceed.
Step 9: Select Approval Type

- After submitting your email ID, you will be prompted to select an approval type to verify the change.
- Choose OTP through SMS as the preferred method (this option is selected by default in the images).
- Other options like Using Debit card or Visiting Branch are available, but OTP through SMS is the most convenient.
- Click Submit to continue.
Step 10: Confirm with High Security Password via SMS
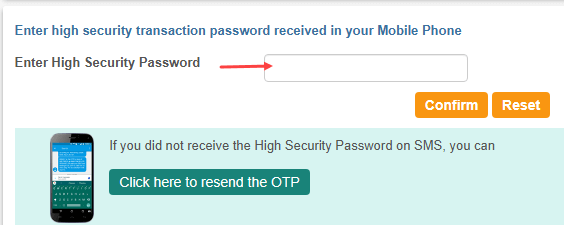
- If you selected OTP through SMS, you will receive a High Security Password (OTP) on your registered mobile number.
- On the subsequent page, enter the High Security Password in the provided field.
- Click Confirm to verify the OTP.
- If you didn’t receive the OTP, click Click here to resend the OTP to get a new one.
Step 11: Verify Successful Update

- After successful verification, you will see a confirmation message stating Email address updated successfully with a smiley icon.
- The page will also provide instructions to change the OTP delivery mode to SMS and email if needed. You can do this by navigating to Profile > High Security Options > OTP Delivery Mode.
- Click Return to My Account Details Page to go back to the dashboard.
You can now go to My Profile section where you can see your email ID is now linked with your SBI account.

Conclusion
By following these detailed steps, you can easily register and update your email ID with your SBI account using net banking. This process enhances your account security and ensures you stay informed about all transactions.
If your email address is not registered or linked with your SBI account, then you can also follow the above steps and register your email ID online via Internet Banking.