
ICICI iMobilePay Mobile Banking application has now made it possible for you to approve your IPO mandate request and submit your IPO application directly from the app. If you are using an ICICI iMobilePay UPI account, you can also apply for an IPO and accept a mandate on the iMobilePay app.
All you need to do, just link your bank account with ICICI iMobilePay UPI and create your UPI ID.
In this article, we will guide how to create an IPO mandate request using ICICI iMobilePay UPI ID and approve the mandate request. Read also: How to update ICICI Bank account address online
Table of Contents
Apply IPO & Create Mandate using ICICI Mobile Banking UPI ID
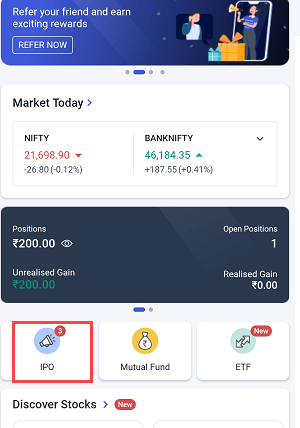
Step 1: Open your Demat account application and open the “IPO” section where you can apply for IPO.
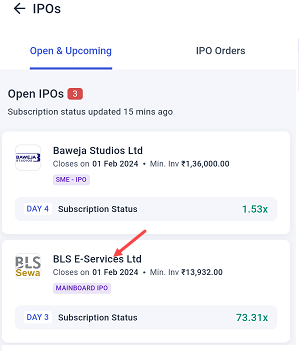
Step 2: Now, select the IPO you want to apply for. We will select the BLS E-services IPO.
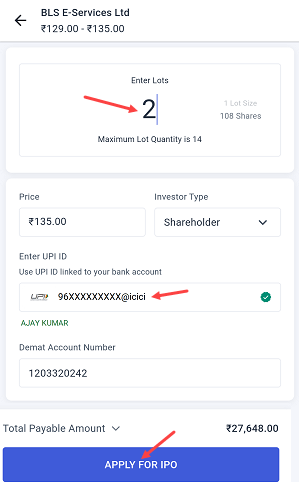
Step 3: Enter the lot number you wish to apply for. Each lot costs approximately 14,000 rupees. Next, provide your ICICI iMobile Pay UPI ID and click the Apply button.
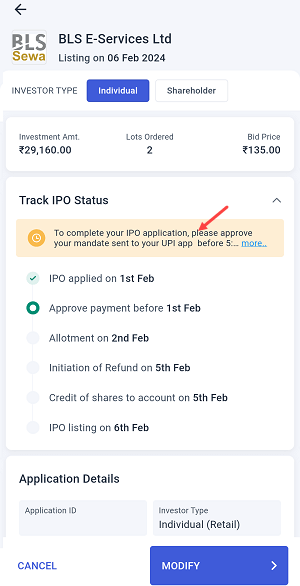
Step 4: You have successfully placed an IPO order and the UPI mandate has been created successfully and sent to the ICICI iMobile Pay Mobile Banking Application. To complete your IPO application, you need to approve your mandate before 5 PM.
Approve IPO UPI Mandate on ICICI iMobile Pay Mobile Banking App
You will receive your IPO mandate request within 30 minutes on your ICICI mobile banking Application. ICICI Bank will send an SMS once you receive your mandate request on the mobile app.
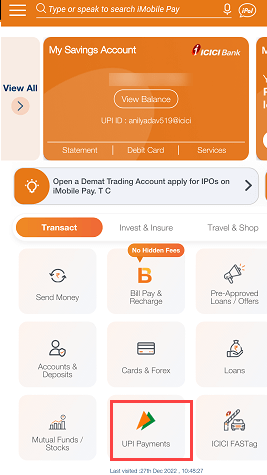
Step 1: Login to the ICICI iMobile Pay Mobile Banking application and go to the “UPI Payments” section where you can manage your UPI accounts.
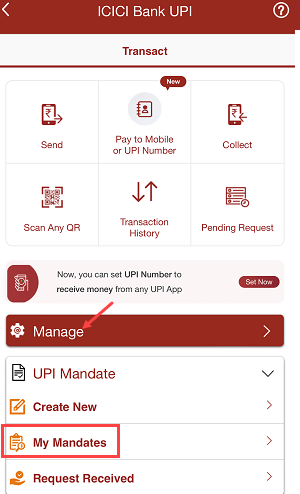
Step 2: In the UPI Payments section, tap on “Manage” and you can see the “My Mandates” option, click and open it.
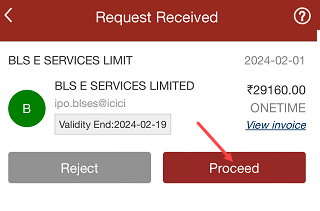
Step 3: You will see your IPO mandate request here, tap on the proceed button to accept your mandate request.
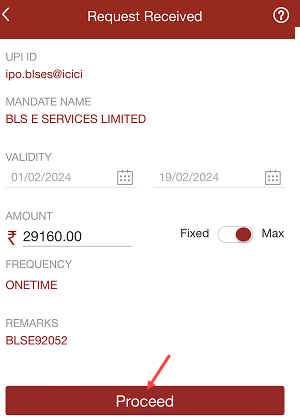
Step 4: Next screen, tap on the proceed button to confirm your approval.
Step 5: To proceed, please click on the “Confirm” button and accept the mandate request.
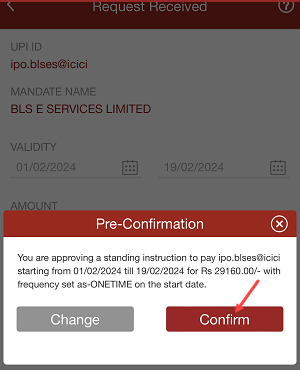
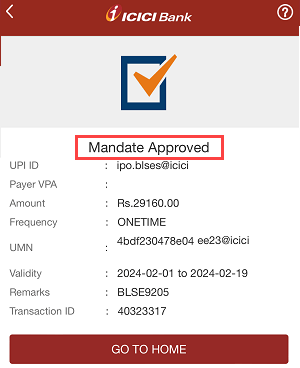
Congrats, you have successfully approved your IPO mandate request on the ICICI iMobile Pay mobile banking app.
Your IPO Application Submitted successfully After Approving Mandate on ICICI iMobile Banking
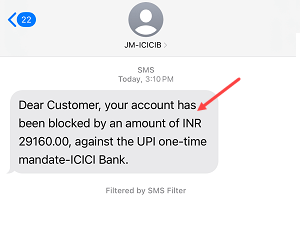
After accepting the IPO mandate request on ICICI iMobile Pay App, your IPO application will be successfully submitted, and the amount will be blocked in your bank account. You will receive an SMS from your bank regarding this.
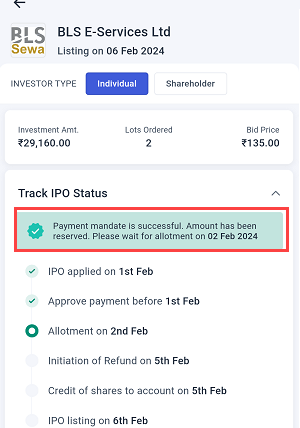
Please go back to your Demat account to check the status of your IPO application. After 2-3 hours, you will be able to see if your payment mandate has been successful. You will be able to view your IPO status, including information on when the IPO has been allotted, refunds if the IPO is not allotted, and the listing date.
After the IPO allotment is announced and you receive an allotment, the blocked amount will be debited from your bank account and you will receive a debit SMS from your bank.
If you do not receive an allotment, your money will be unblocked on the same day and you will receive an SMS from the bank stating that your IPO mandate has been revoked and your money has been unblocked in your bank account.
I hope this detailed guide that I have provided will be useful to you in approving your IPO mandate request on the ICICI iMobilePay application.